Timeline view
Lay a board out left to right in chapters, acts, or days, with a lane for each character or plotline, and move cards through the story.
Timeline lays your cards out left to right in columns you can name (chapters, acts, days, or episodes), and it can split them into lanes that run across the columns, one for each character, plotline, location, or whatever's helpful. It's a good fit when you want to see which threads are carrying each part of the story, and where one drops out for a while.
Timeline is included with the Starter plan and above.
Open a board in Timeline
Pick Timeline in the view switcher in the board header, next to Board and Kanban. On a phone, tap the view name at the top of the board and choose Timeline from the menu.
The first time you open a board in Timeline, Cork sets it up from what's already there:
- If the board has two or more Kanban columns, the timeline starts with the same columns, in the same order, holding the same cards.
- Otherwise it starts with a single column called "Chapter 1" that holds every card.
After that, the timeline is its own arrangement. Its columns, their order, and where each card sits are kept separately from Kanban and from the corkboard, so you can rework the timeline without disturbing either of them, and the other way around. And new cards you make in Board or Kanban view will appear at the end of the timeline's last column, ready for you to move into place.
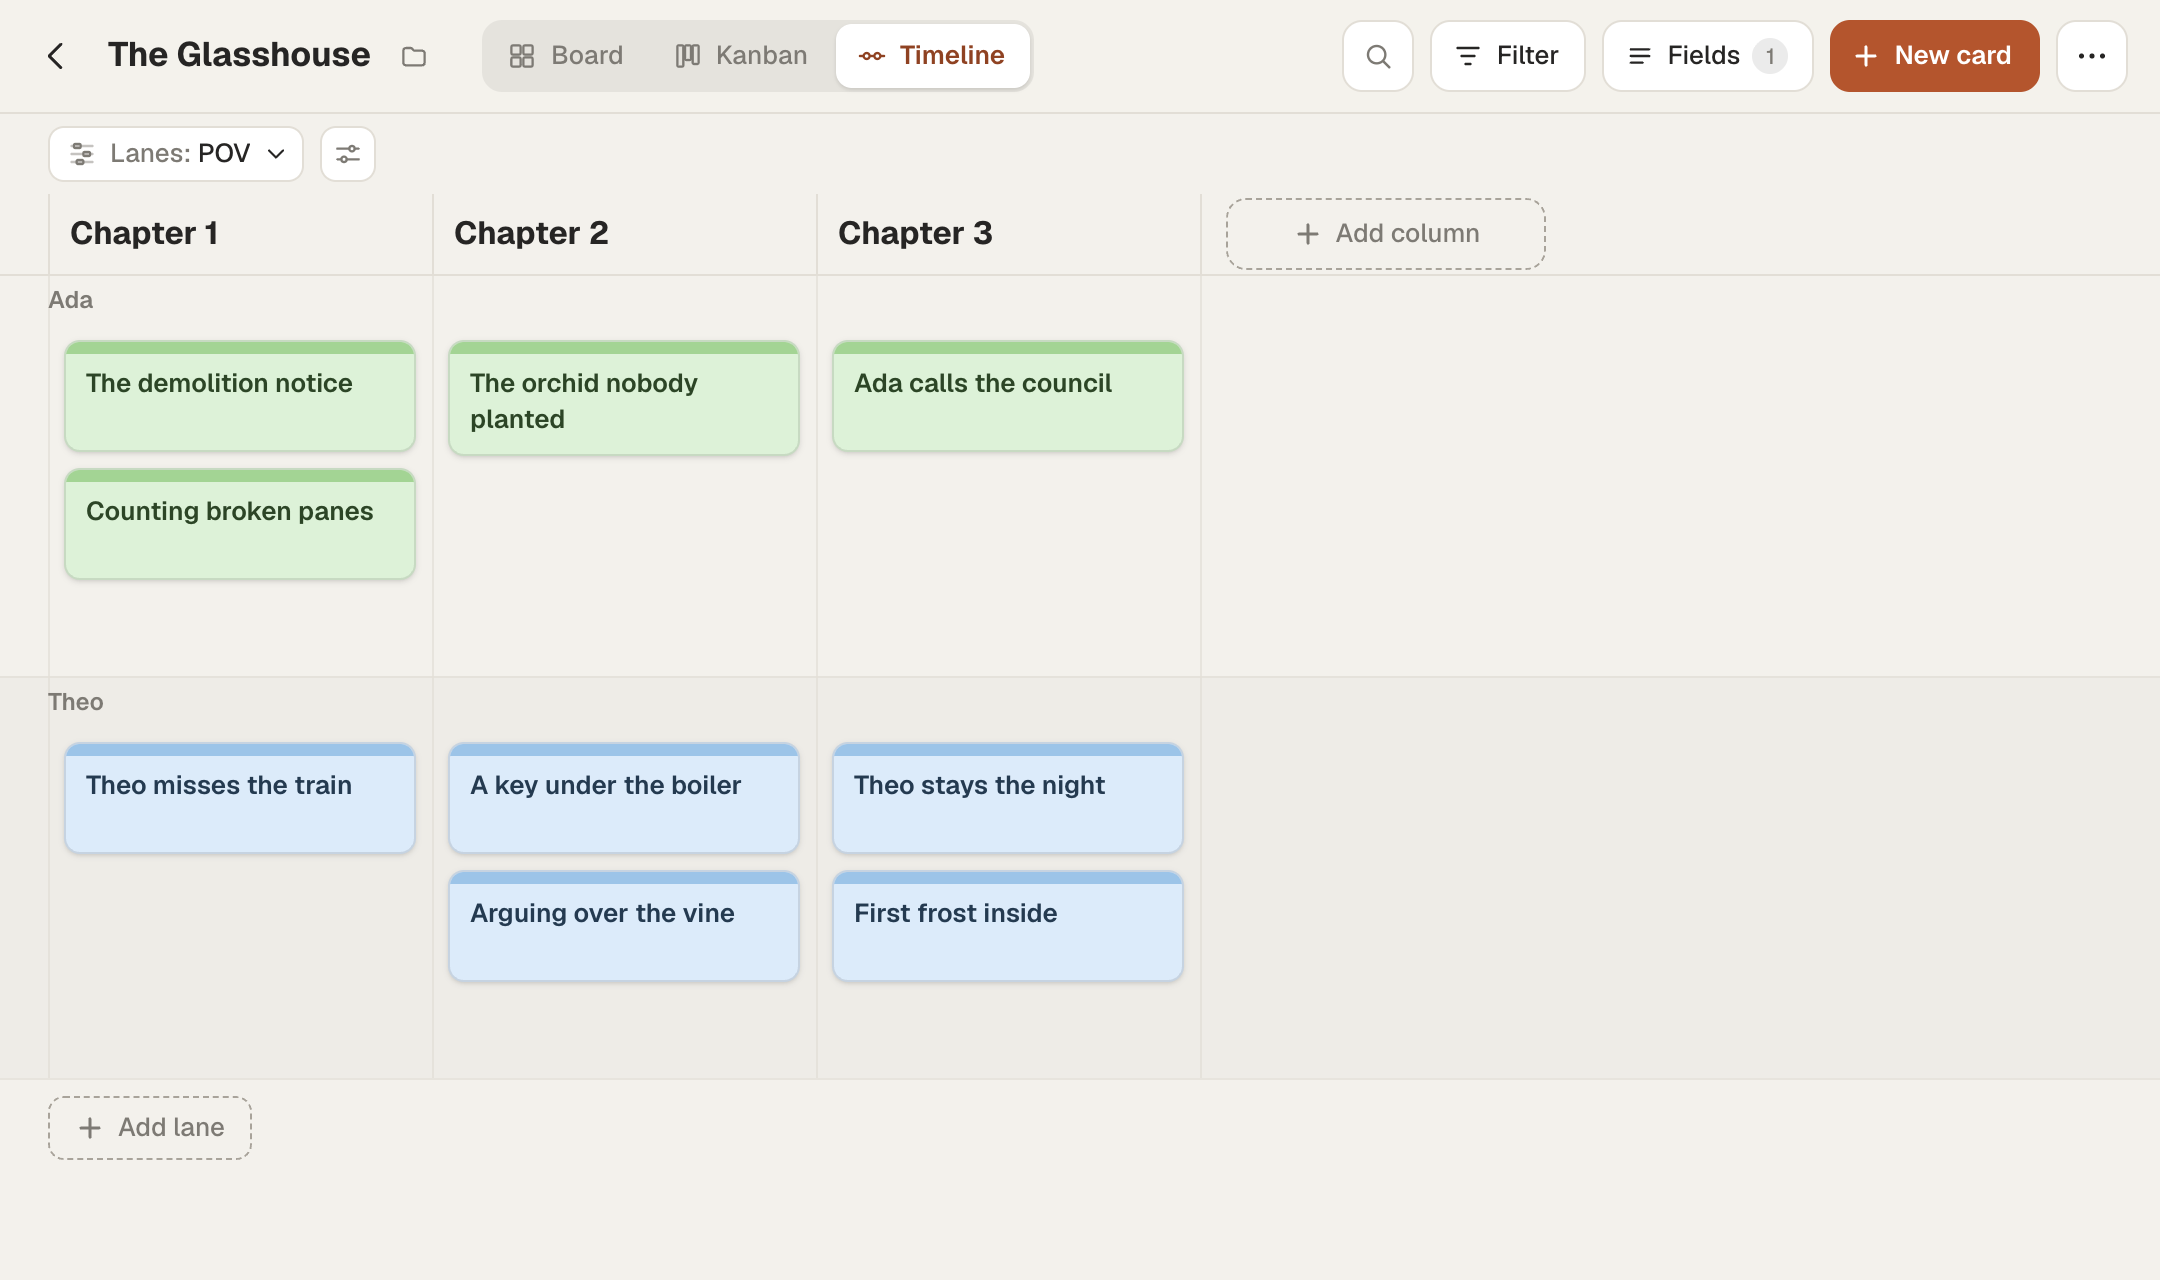
Set up your columns
Each column has a name at the top. Here's how to shape them:
- Rename a column by clicking its name, typing, and pressing
Enter.Esccancels. - Add a column at the end by clicking Add column, after the last column. New columns are named "Chapter 2", "Chapter 3", and so on; rename them to whatever your story uses.
- Use the column menu (the ⋯ button beside a column's name) for Rename, Add column before, Add column after, Move left, Move right, and Delete.
- Reorder columns by dragging a column's header sideways. On a touch screen, press and hold the header first.
When you delete a column that has cards in it, the cards don't get deleted. They'll either go to the end of the column on its left, or to the next column if you deleted the first one. A timeline must always have at least one column, so the last one can't be deleted.
Add lanes
Lanes split each column into rows, so you can visualize cards across two dimensions, like where something happens and when. Open the Lanes menu above the timeline (it shows the current choice, like Lanes: None) and pick what data to use to power the lanes:
- None: one row, no lanes.
- Tags: a lane for each tag, in alphabetical order. A card with two tags appears in both lanes. This choice shows up once any card on the board has a tag.
- Color: a lane for each card color in use.
- Any custom field on the board. A Choice field gives a lane for every option, in the field's own order, even options that are not yet in use. Text, Number, and Date fields create a lane for each value in use.
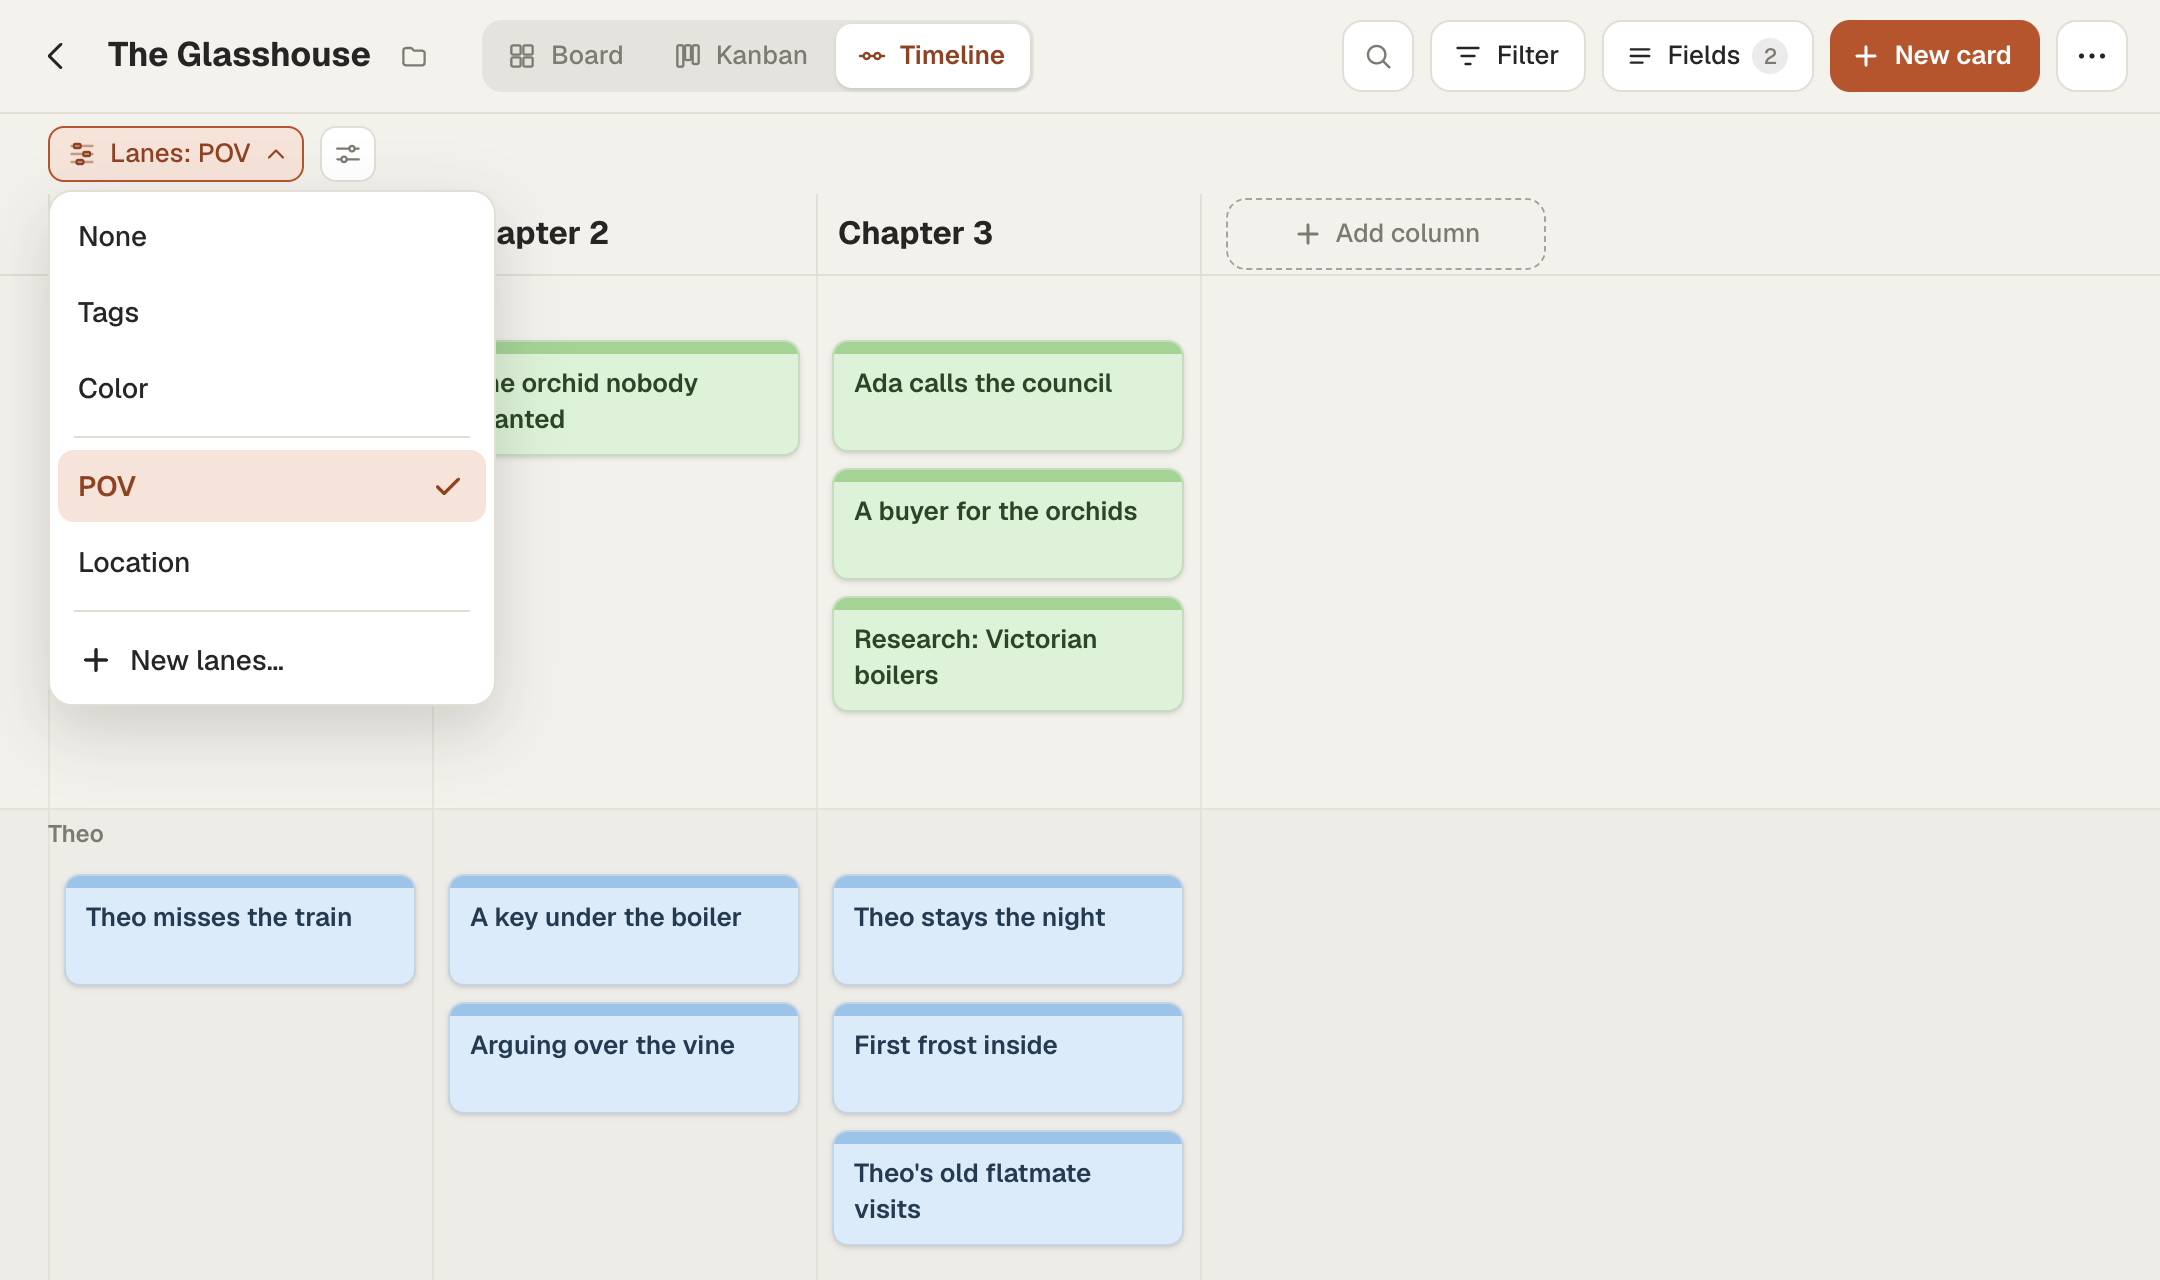
Cards with no value for the lanes you chose sit in a lane at the bottom, called "No tags" or "No" plus the field's name (for example, "No POV" for a field called POV).
Edit Choice-field lanes in place
When the lanes come from a Choice field, you can change the lanes without opening Fields:
- Add lane, under the last lane, adds a new option to the field. Two lanes can't share a name.
- Each lane's ⋯ menu has a Rename option, which renames that value on every card that uses it, and Delete lane, which removes it. Cards in a deleted lane move to the "No …" lane, and Cork asks you to confirm first if the lane has any cards.
A Choice field can have up to 24 options, so Add lane turns off when the field reaches that limit.
Start lanes from scratch
If the board doesn't have a field that fits, choose New lanes… at the bottom of the Lanes menu. Cork asks "What do the lanes show?", suggesting "Plotline", and you can type "Character", "Location", or anything else. Click Create, and Cork adds a Choice field with that name to the board, with one lane called "Main plot", and switches the timeline's lanes to it. Rename "Main plot" and use Add lane for the rest.
Move cards through the story
Drag a card to a new spot in its column, or into another column, to change where it falls in the story. A line shows where it will land.
Dragging a card into a different lane changes that value on the card:
- Field lanes set the card's field to the lane's value. Dragging into the "No …" lane clears it.
- Color lanes recolor the card.
- Tag lanes swap the tag of the lane it leaves for the tag of the lane it joins. Dragging into "No tags" removes the tag it left.
These changes are real edits to the card, so they show in every view. Moving a card between columns, or up and down within one, only changes the timeline.
While the board's Filter is on, dragging pauses on the timeline, as it does in the other views. Clear the filter to move cards again.
Add cards where they belong
Every empty spot has an Add card button at the bottom edge. On a computer it appears when you hover over a spot; on a touch screen it's always there, faintly. The new card starts in that column and that lane, with the lane's value already filled in, and opens so you can write it. The New card button in the board header adds a card at the end of the last column.
Choose a layout and card size
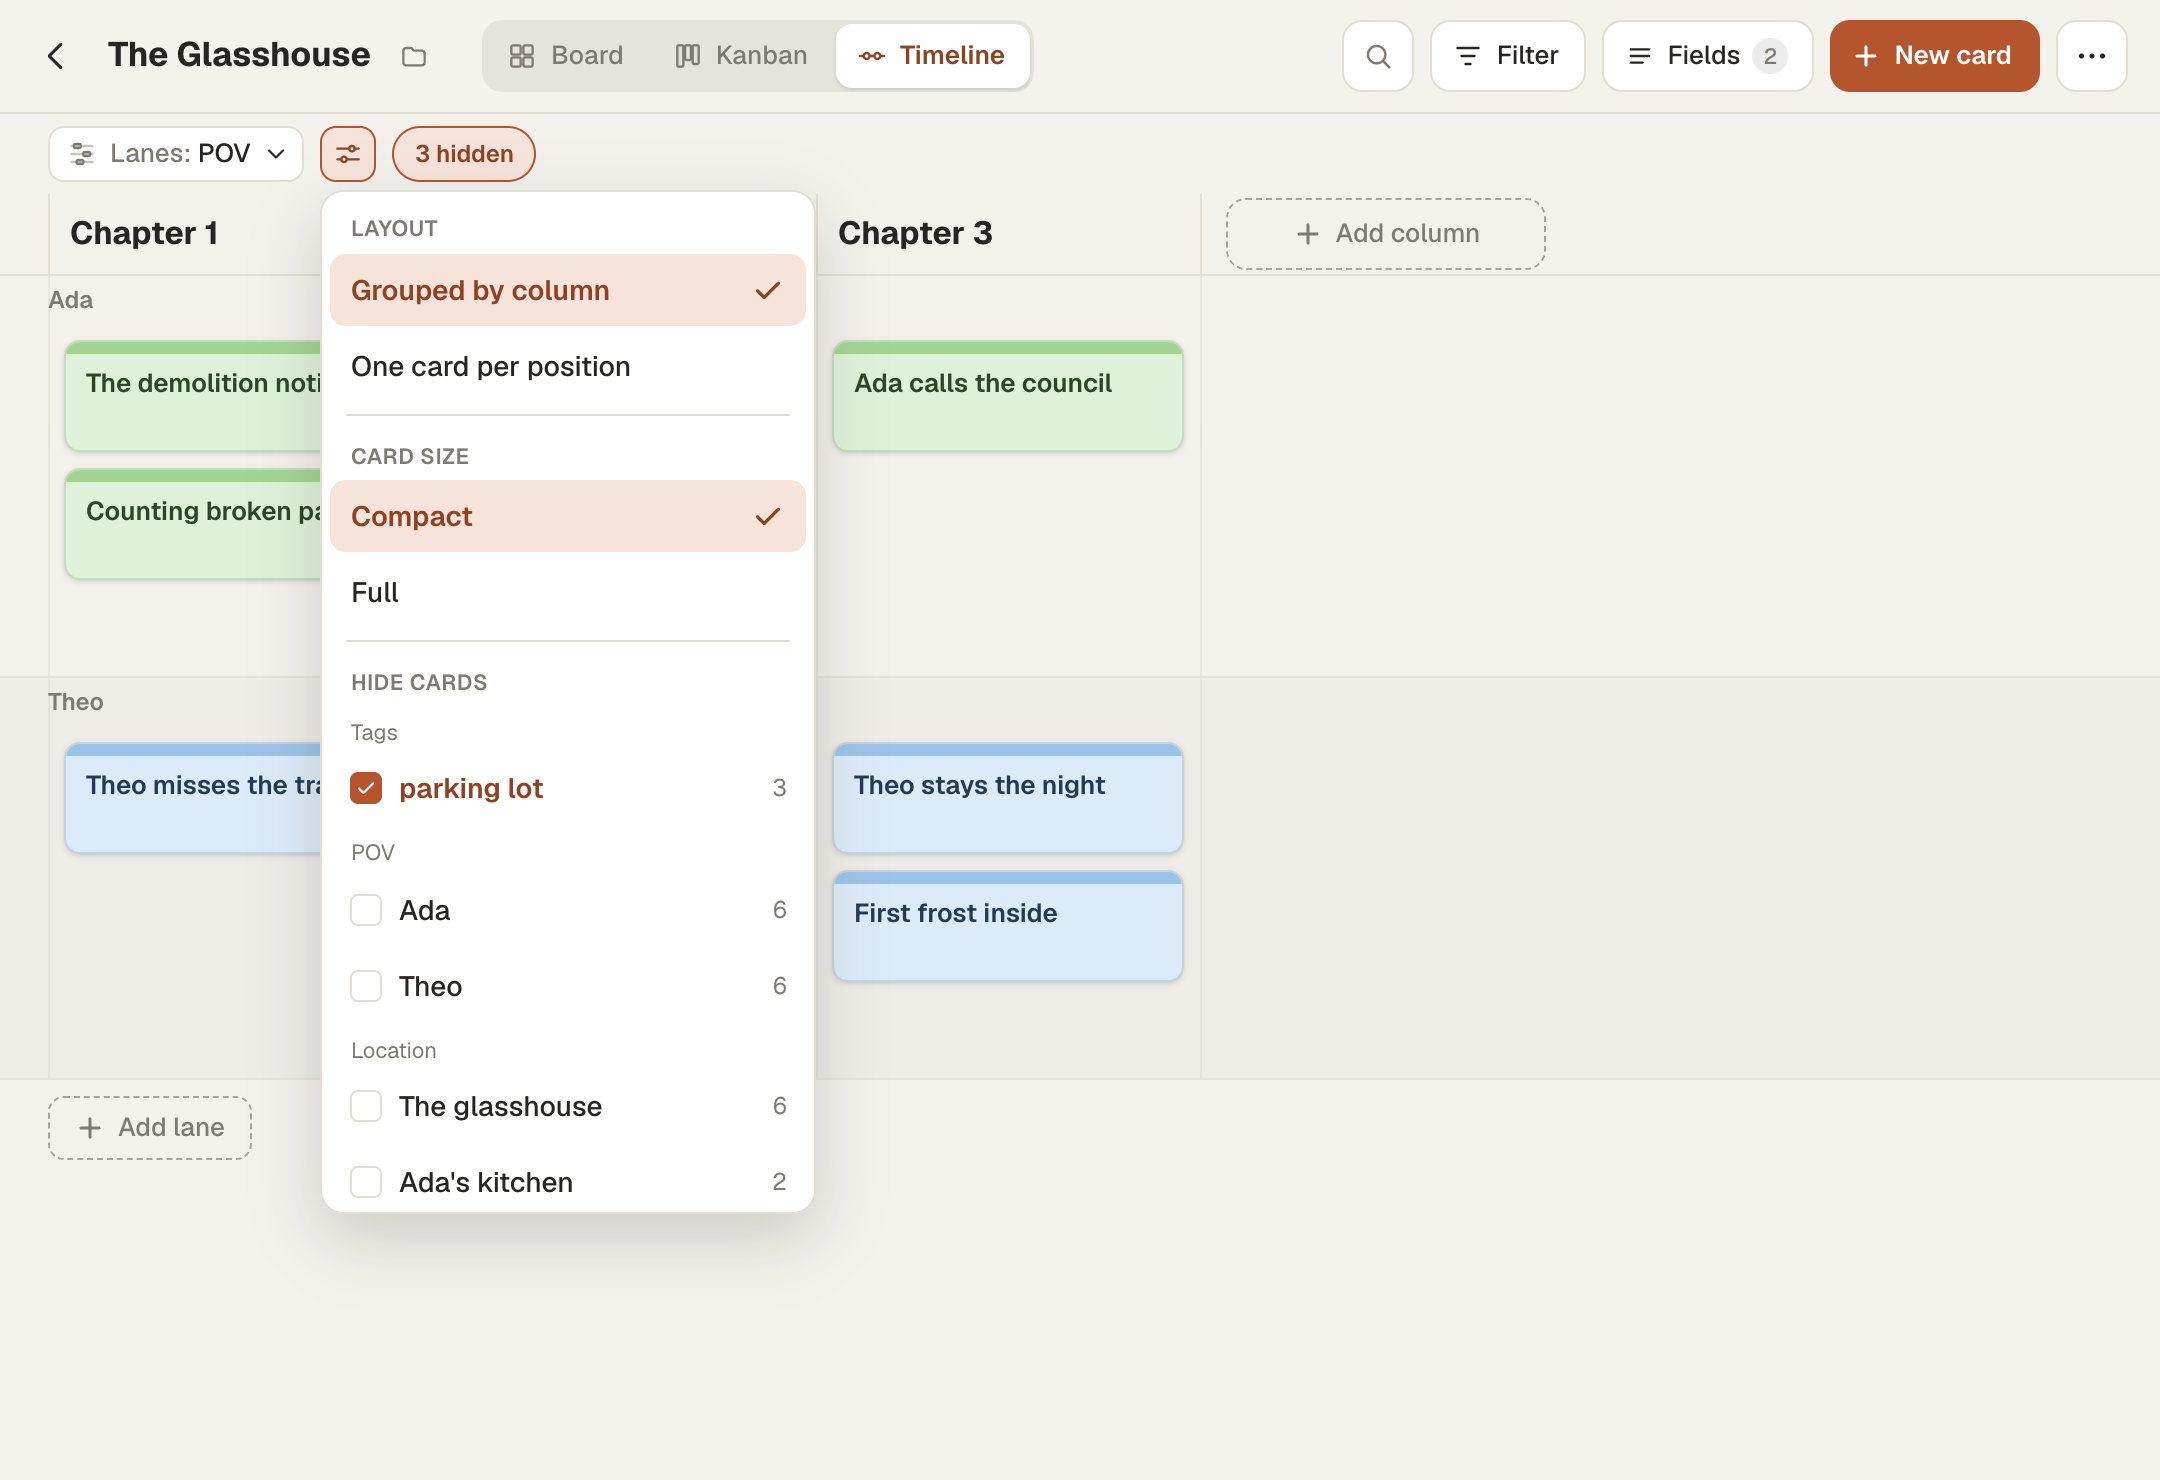
Click View options (the button beside the Lanes menu) to change how the timeline is drawn. Under Layout:
- Grouped by column stacks each card top to bottom, so every column is one card wide. It keeps a long timeline compact.
- One card per position gives every card in a column its own place, left to right, so a card's position in the sequence lines up across all the lanes. It shows the exact order of events between threads, but it can get unwieldy and wide.
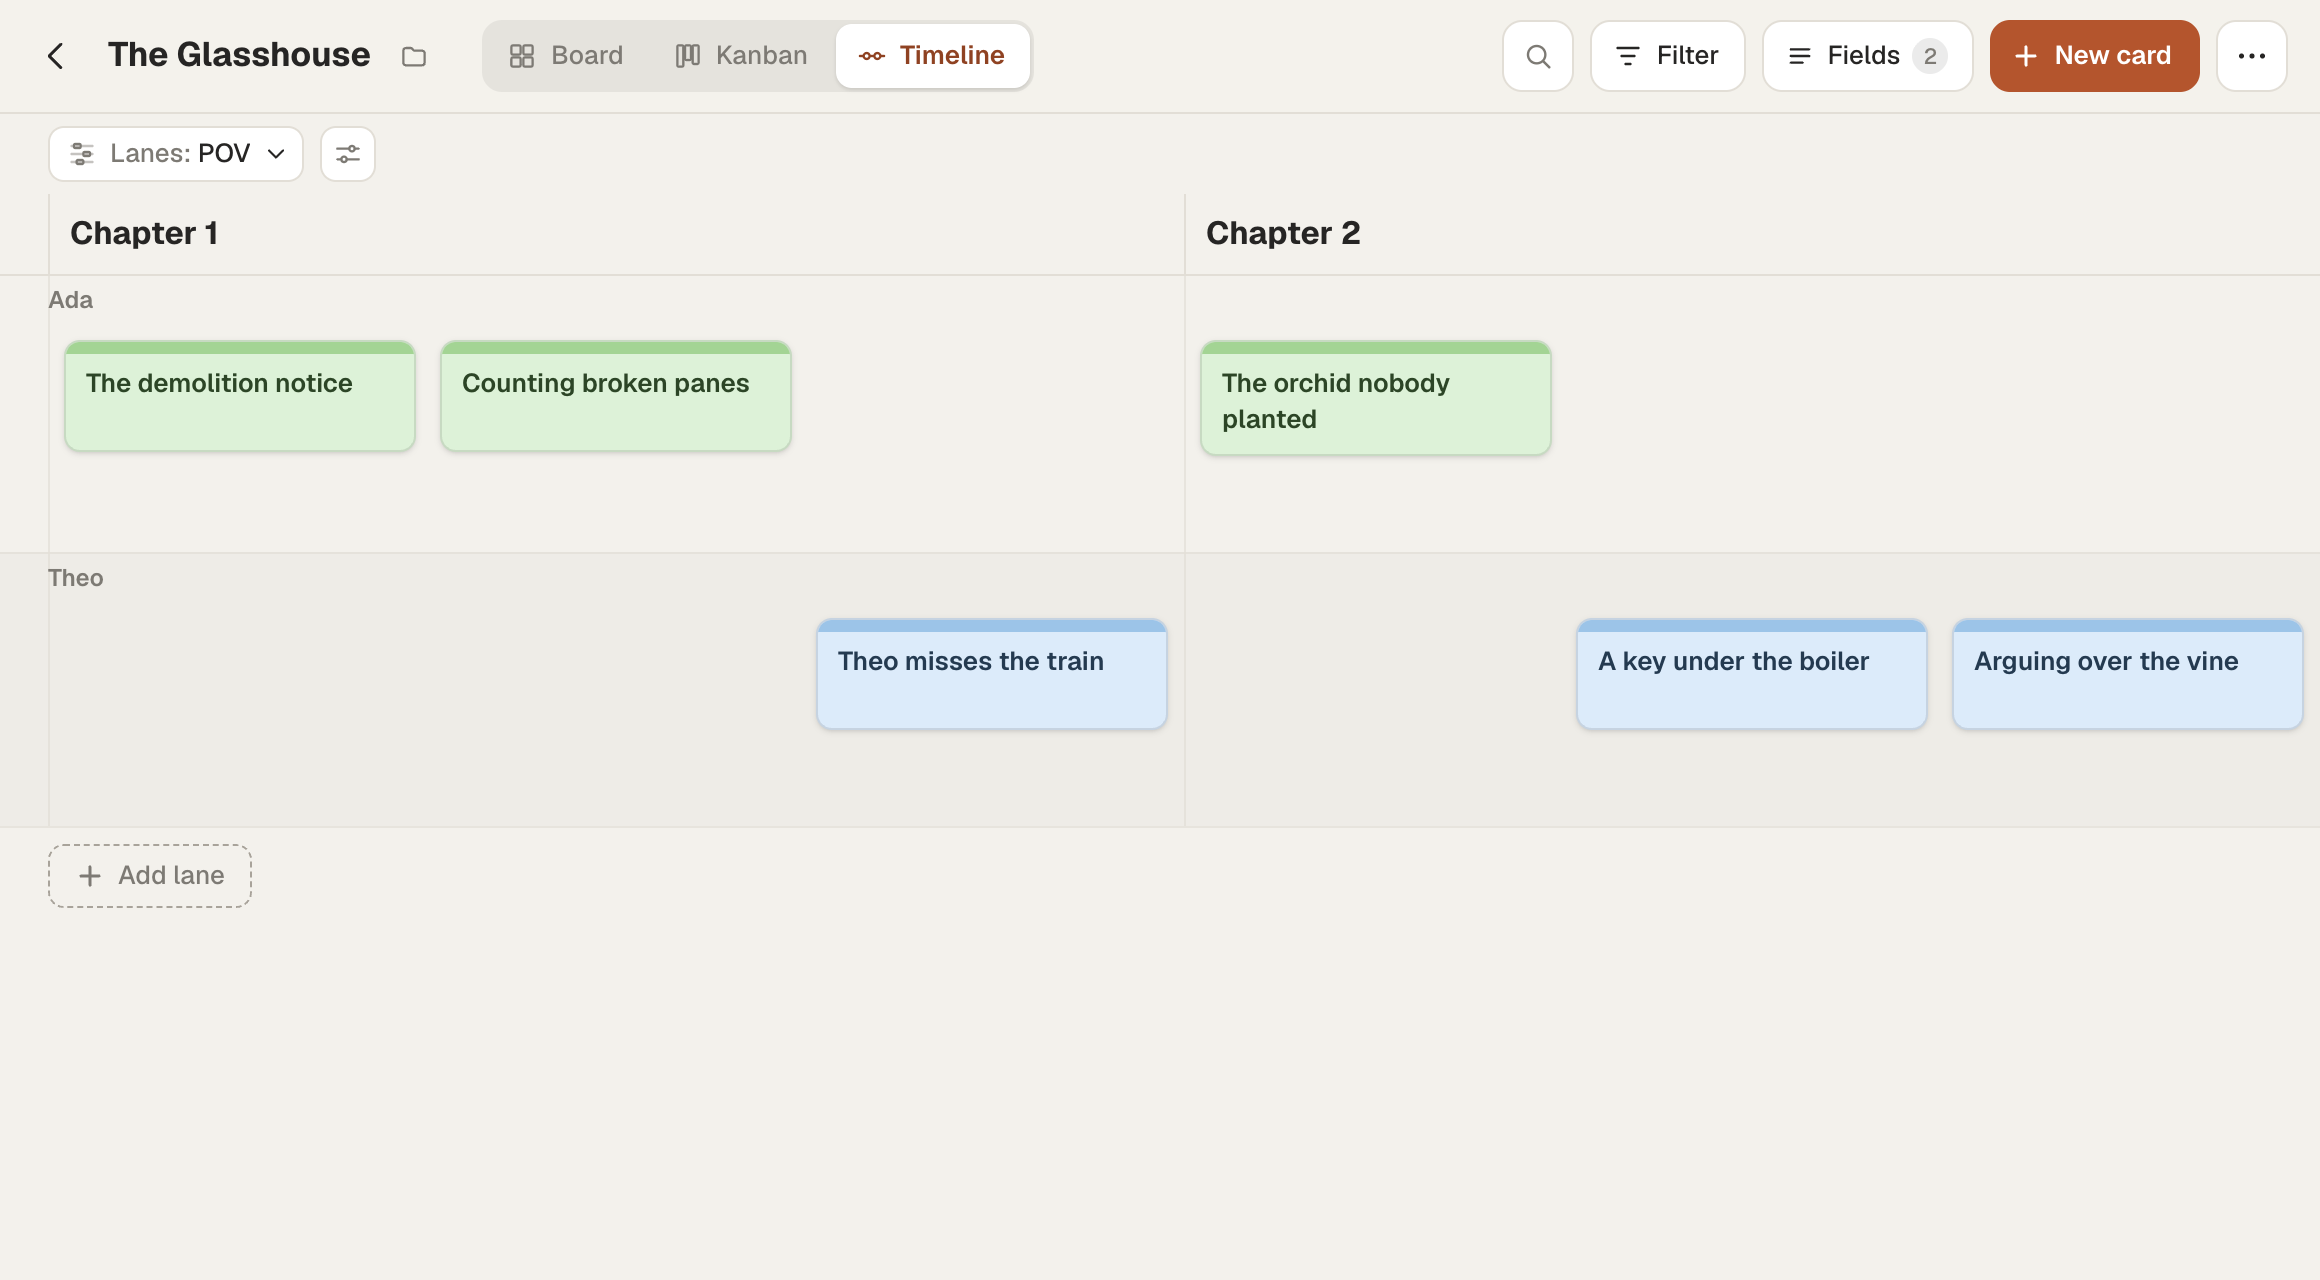
Cork defaults to Grouped by column when the timeline has lanes and One card per position when it doesn't.
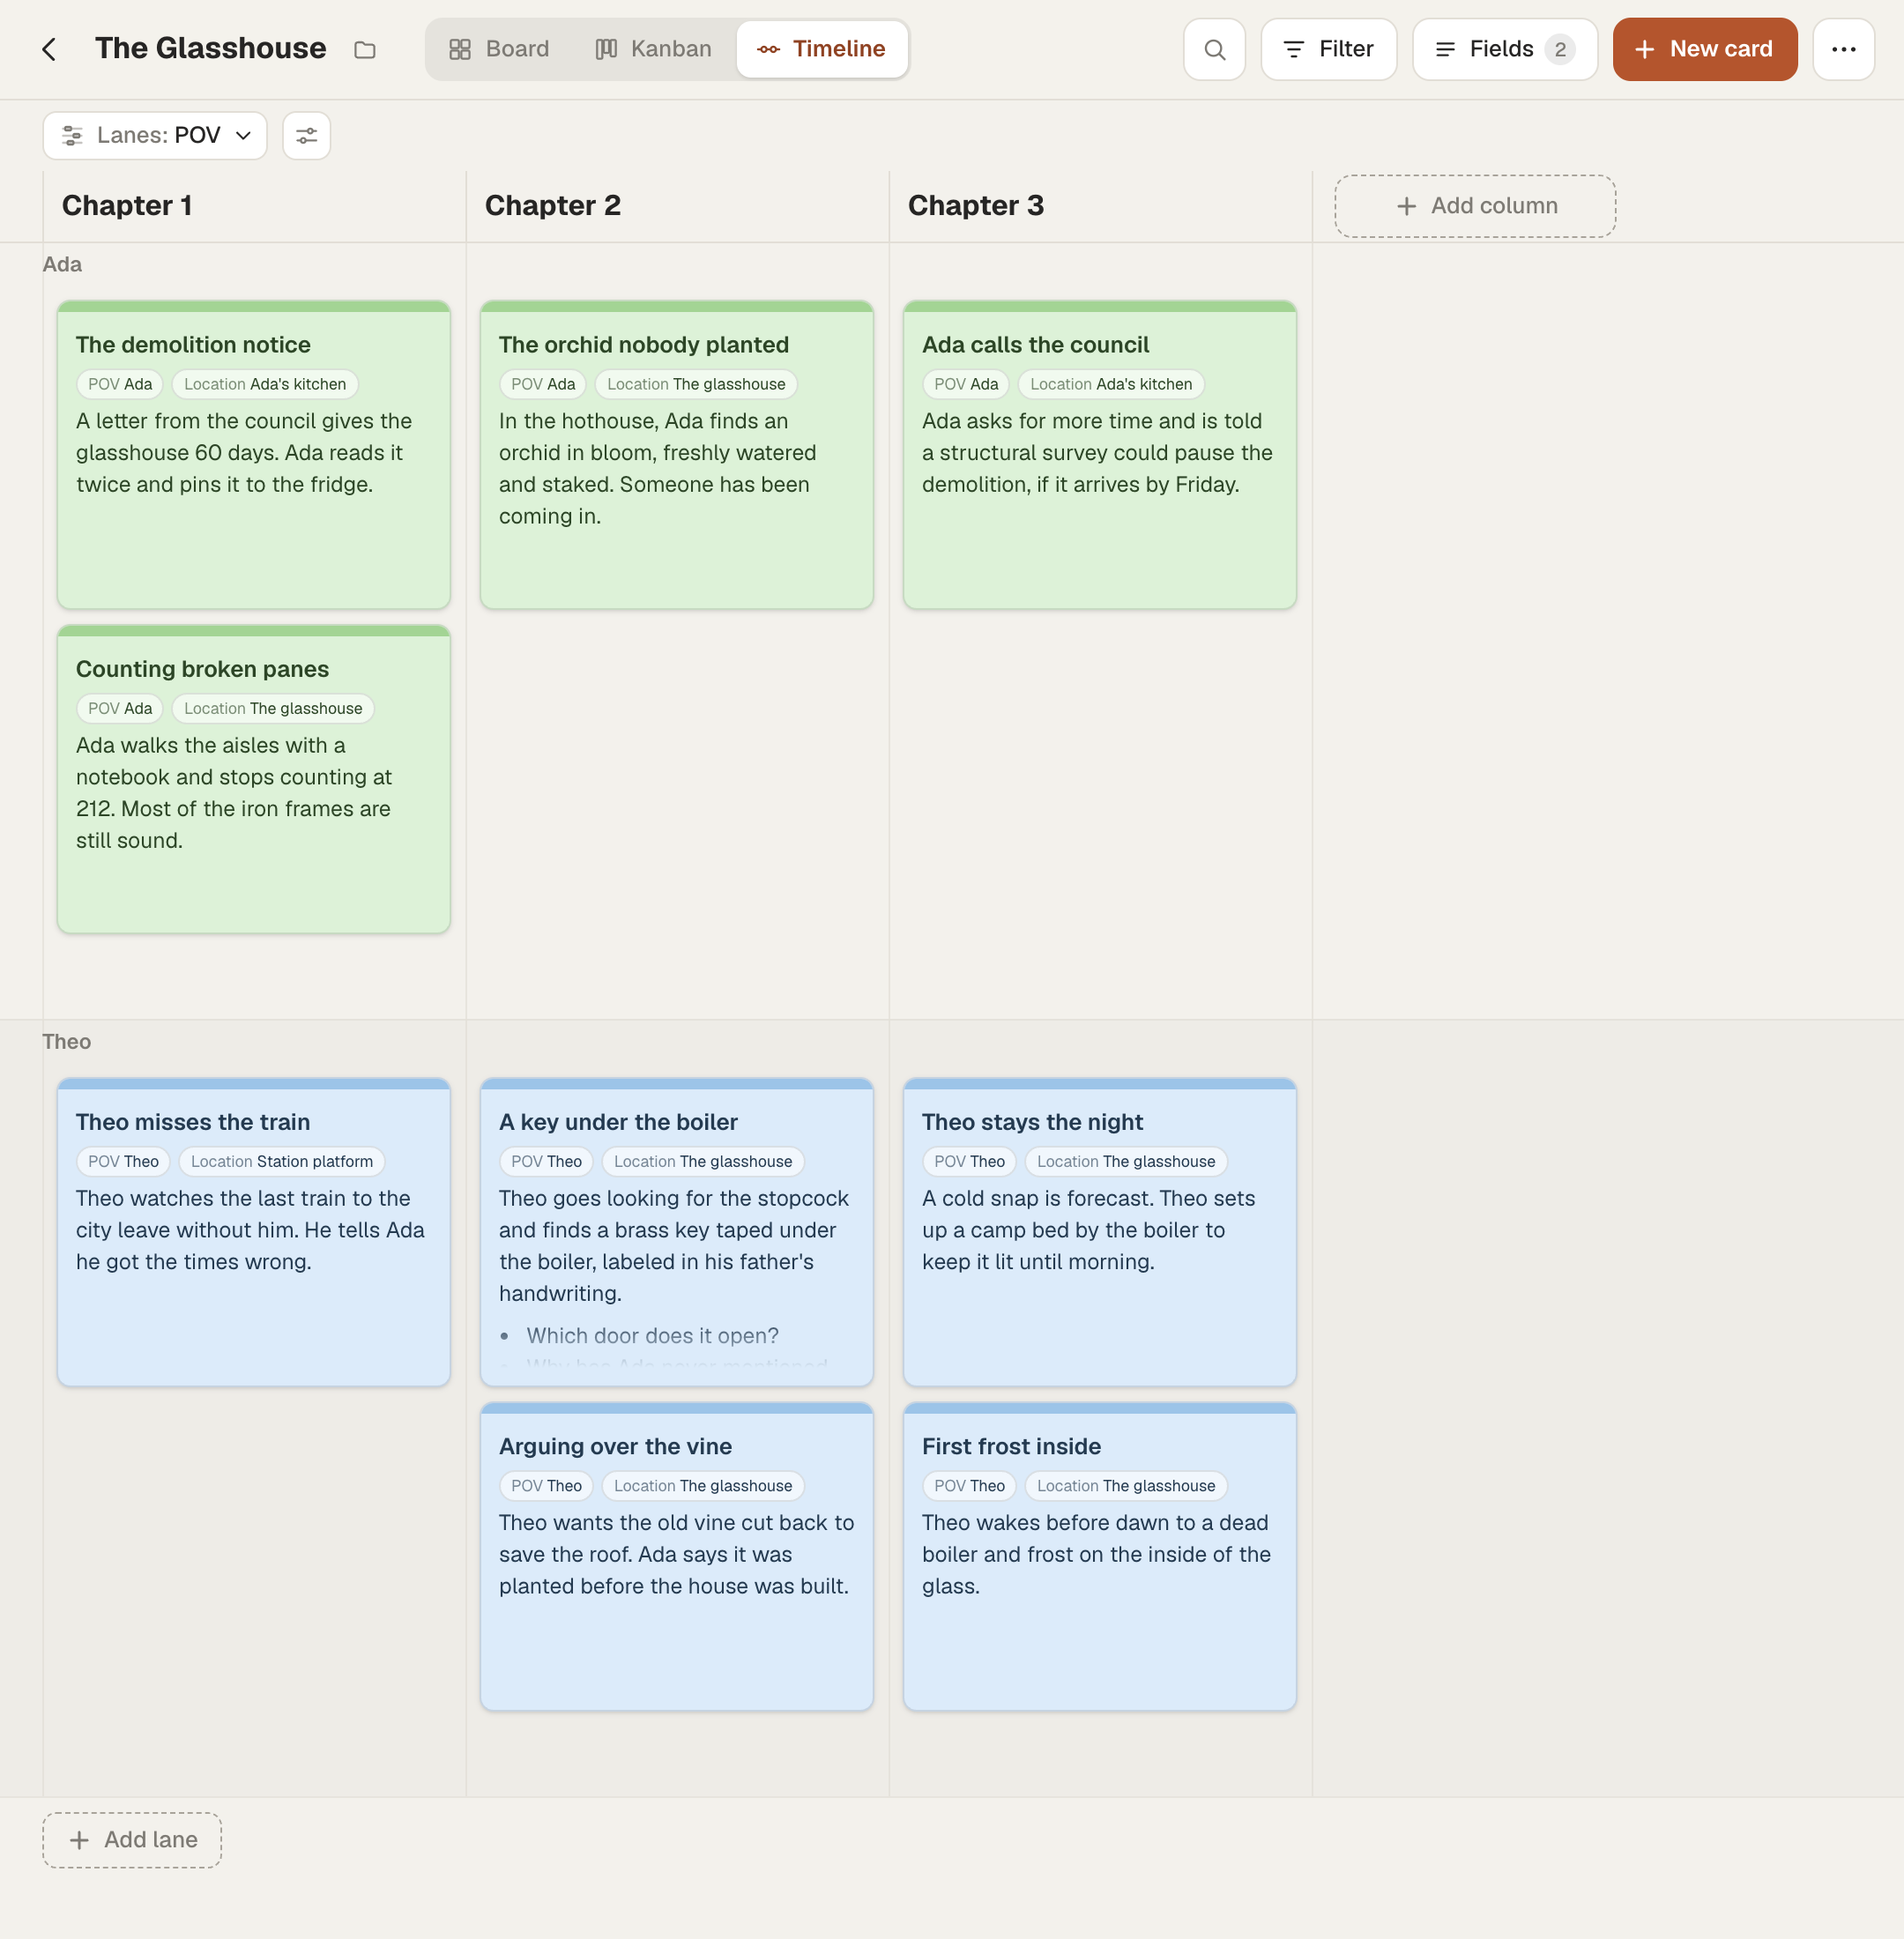
Under Card size, Compact (the default) shows each card's color and title only, and Full shows cards the way they look in the other views.
Hide cards from the timeline
Some cards belong on the board but not in the story's sequence: research notes, cut scenes, or ideas you haven't placed. Hide cards, in View options, keeps them off the timeline while they stay on the corkboard and in Kanban.
The list shows the board's tags, each Choice field's options, and each Text field's values in use, with counts. Check the ones to hide. A card is hidden when it matches any value you've checked. (The header Filter works the other way across its sections: a card has to match every section in which you've checked something.)
Timeline in exports, presentations, and shared boards
When a board is in Timeline, the other ways of reading it follow the timeline:
- Exporting gives the cards in timeline order, with each timeline column as a section. Cards hidden on the timeline follow at the end under "Hidden on the timeline".
- Presentation mode goes through the cards in timeline order and skips the hidden ones.
- A share link shows the timeline to visitors, read-only.
If you change plans
If you move from Starter or above to Free, a board saved in Timeline opens in Kanban view instead. Its timeline columns, lanes, and settings are kept, and they come back as they were if you upgrade again. See plans and billing.